Checklist before launch website
Launching a website can be a tedious task. Hence, we provide checklist before launch website for you to ensure smooth and successful website launch when you make your site public.
- Delete unused page, content, plugin, media
To delete an unused web page or blog post, click “Pages” or “Posts” located at the left side menu and click “Trash” to delete page or post. If you wish to delete content on the page or post, click “Edit” and delete the unused content.

Installed plugins can be deleted by clicking “Plugins” and select the unused plugins to be deleted.

To delete unused or duplicate images, go to (Media -> Library). Select the image and delete it.

2. Test form
First, make sure the field that mark required need to be completed or else will show error message before you can submit the form. Next, check the email field to make sure user can only type in correctly formatted email address. Make sure the notification emails can be sent to recipient inbox once the form is submitted. To test the notification emails, set the recipient email as your own email. Then fill in the form and submit it. If you received email notification means that the form works correctly.

3. Make sure all links work correctly
To know whether the links work properly or not, click all the links and button in the website. Make sure all the links can be direct to its page without being direct to error page.


4. Set SEO title and meta
To set page SEO, click on “Pages” and select the page to set SEO.

Then, click on the score button located at the top right corner of the screen. Focus keywords can help you to rank your page when people search for the phrase that related to your website. Enter the word that people mostly search on search engine on focus keyword field. To edit SEO title, click on “Edit Snippet”. Now you can change the SEO title for your website. Beside that, you can also add the meta description which will appeared in the google search result page along with the title. You can check for the SEO score which indicate by the colour. Red colour is the lowest, orange colour is middle while green colour is the best. It is advisable to score 60 score and above to increase the chances for Google to rank your page.


5. Set Google Search Console
Google search console (GSC) is a tool provided by Google that helps you monitor and troubleshoot your site’s presence in Google Search results. To add your website in Google Search Console, search for “Google Search Console”, click “Start Now” and login or register with your email account.

Select URL prefix. Enter your website URL and click “Continue”.

After input the website URL, you need to verify your site. There are various methods for you to verify your site which include HTML file, HTML tag, Google Analytics, Google Tag Manager and etc. In our case, we will use HTML tag. Copy the html tag and paste it to Google verification code under Webmaster Tools in Rank Math. Click save changes and go back to Google Search Console. Click “Verify” to complete the process.

Go to Google search console, click “+ Add property” to add your website into Google Search Console.

6. Submit sitemap
You can either manually submit sitemap or use third party plugins like Yoast SEO or Rank Math SEO to add the website to Google. After adding website URL, click “Sitemaps” located at the left side menu bar.

Enter “sitemap_index.xml” if there is domain url in front and click submit. Enter whole url if sitemap url field is completely blank.

Once you submitted the sitemap, check the status and make sure it display “Success”.

7. Test (Responsive, Broken links)
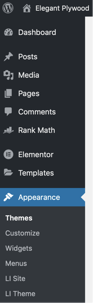
To test the responsiveness of your website, go to (Appearance -> Customize). Click on the desktop icon, tablet icon and phone icon to check the page responsiveness when browsing website on the selected device. Broken links are the links that direct to 404 page. Test all the links in your website page for example (homepage, about page, contact page) to prevent having broken links on your website. Having a broken links on your website will lower down your search engine rankings and impact your site’s user experience.

In conclusion, I hope this article may help you to avoid simple mistakes and errors in your daily projects once the website is launched.