What is AWS?
Amazon Web Services (AWS) is a cloud platform that offers a wide variety of services that you need. The service categories includes compute,
cloud provider could offers. It has the most operational experience which help to provide services to millions of customers around the world.
Table Of Contents- What is AWS?
- What is Amazon EC2?
- Why you need an instance?
- Prerequisite in setting up Amazon EC2
- Steps to launch an instance in Amazon EC2
What is Amazon EC2?
Amazon Elastic Compute Cloud (Amazon EC2) provide computing capacity in AWS cloud. You can use it to deploy your application and launch virtual server(s) in the cloud.
Why you need an instance?
An instance is a virtual server in the cloud. You might need a virtual infrastructure to run an application.
Prerequisite in setting up Amazon EC2
Sign up AWS
Open AWS console signup page.
Follow the instruction to create an AWS account.
One of the procedure is to enter 4 digit verification code.
Create key pair
Open Amazon EC2 dashboard.
Choose Key Pairs under Network & Security from left sidebar.
Click ‘Create key pair’ button.
Enter key pair name. Choose private key file format. Select ‘pem’ format to use with OpenSSH else select ‘ppk’ format to use with PuTTY. After done, click ‘Create key pair’.
The private key file is automatically download by the browser. Save the private key in safe place as you need it to access your instance.
Create a security group
Open Amazon EC2 dashboard.
Select a Region (20 public regions) for security group from navigation bar.
Choose Security Groups under Network & Security from left sidebar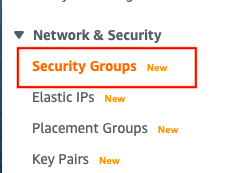
Click ‘Create security group’
In Basic details section, enter name for security group, description and select default VPC for region.
In Inbound rules section, click ‘Add rule’ to add following rule:
– Choose HTTP for Type and Source set to Anywhere
– Choose HTTPS for Type and Source set to Anywhere
– Choose SSH for Type and Source set to My IP
After done, click ‘Create security group’ button at bottom right.
Refer AWS documentation for details information.
Steps to launch an instance in Amazon EC2
Open Amazon EC2 dashboard.
Scroll down and choose ‘Launch instance’.
Click ‘Select’ button beside your prefer Amazon Machine Image (AMI) (eg: Amazon Linux, Red Hat, SUSE, Ubuntu, Microsoft or etc). If you want to use Amazon Free Tier service, select AMI with Free tier eligible label.
Next, choose an instance type that fit your needs. Every instance type have different CPU, memory, storage and networking capacity. The pricing depends on storage you choose. Refer on-demand pricing for pricing of different instance type. The t2.micro instance type is eligible for free tier. After done select, click ‘Review and Launch’.
Although wizard already created and selected a security group for you, click ‘Edit security groups’ to select security group you created when setting up.
Ensure ‘Select an existing security group’ is selected. Select the security group you had created earlier from the list and click ‘Review and Launch’.
Click ‘Launch’ after everything is checked.
Select ‘Choose an existing key pair’ from the dropdown and select key pair created during set up.
Select checkbox of acknowledgement and Click ‘Launch Instances’.
It can take some time to launch your instance. Go back to EC2 dashboard, check both Instance State and Status Checks column of the instance. If the instance state is running and there is a green check in Status Checks column, your instance is ready to use.