
How to Add Your Webmail Address as a Sender in Gmail
Introduction
Are you looking to send emails from your webmail address using Gmail? Whether it’s for personal convenience or professional purposes, adding your webmail as a sender in Gmail can simplify your email communication. This step-by-step guide will walk you through the process of adding your webmail address to Gmail so you can send emails directly from your webmail address while using Gmail’s interface.
Steps to Add Your Webmail Address as a Sender in Gmail
- Open Gmail
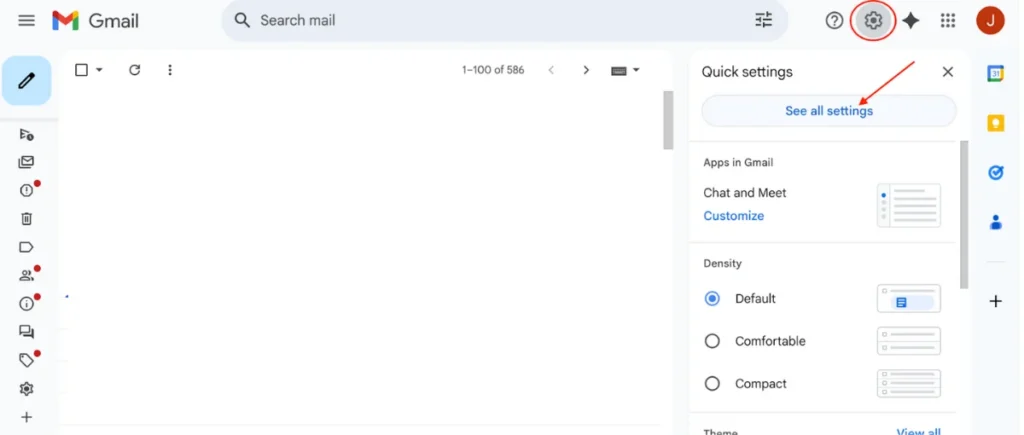
Go to https://mail.google.com and sign in with your Gmail account. - Go to Settings
Click the gear icon (⚙️) at the top right corner of Gmail. From the drop-down menu, click on “See all settings.”
- Go to the Accounts and Import tab
In the settings menu, navigate to the Accounts and Import tab. This is where you can manage email settings related to sending and receiving emails.
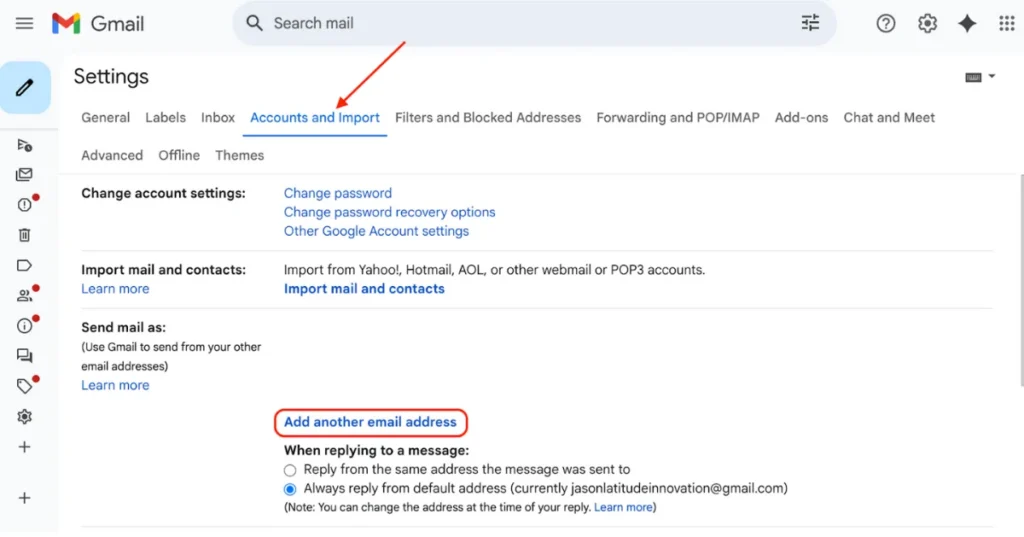
- Under Send mail as, click Add another email address
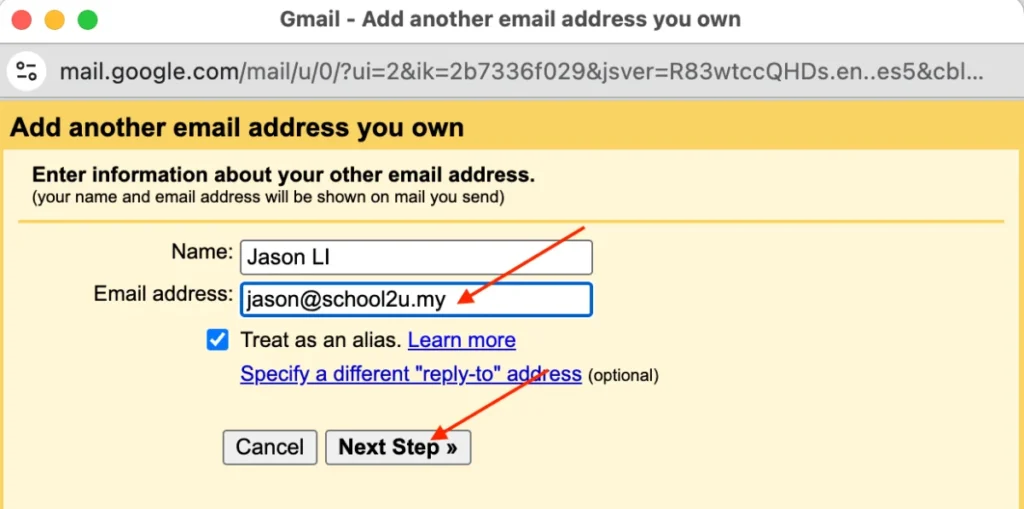
Scroll down to the “Send mail as” section. Here, you’ll see an option to “Add another email address.” Click on it. - Enter your Name and Webmail Email Address, then click Next Step
A window will pop up where you need to enter the name you want to display when you send emails from your webmail address, as well as your webmail email address. After entering the required details, click Next Step.
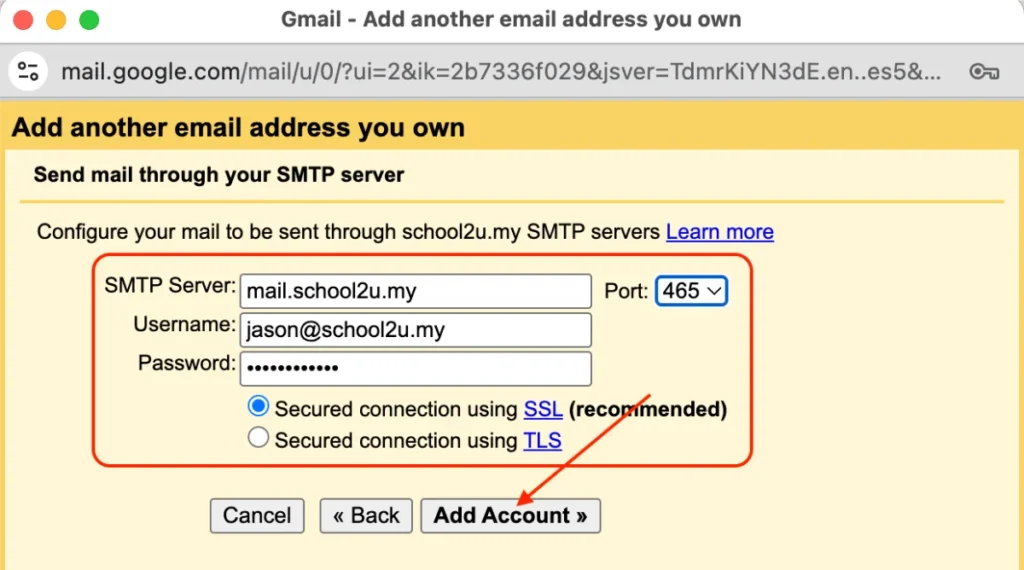
- Enter SMTP settings
Now, you need to provide SMTP (Simple Mail Transfer Protocol) settings to enable Gmail to send emails using your webmail address. The required settings are:
-
-
-
SMTP Server: Usually, it will be something like
mail.yourdomain.com(replace “yourdomain.com” with your actual domain). -
Username: Your full webmail email address.
-
Password: The password for your webmail account.
-
Port: Generally, the port is 465 for SSL or 587 for TLS.
-
Check: Make sure to select “Secured connection using SSL” (or TLS if your server requires it).
-
-
- Click Add Account
After entering the SMTP settings, click Add Account to proceed.
- Click Close window
Once the account is added, you’ll be taken back to the settings page. You can now close the window.
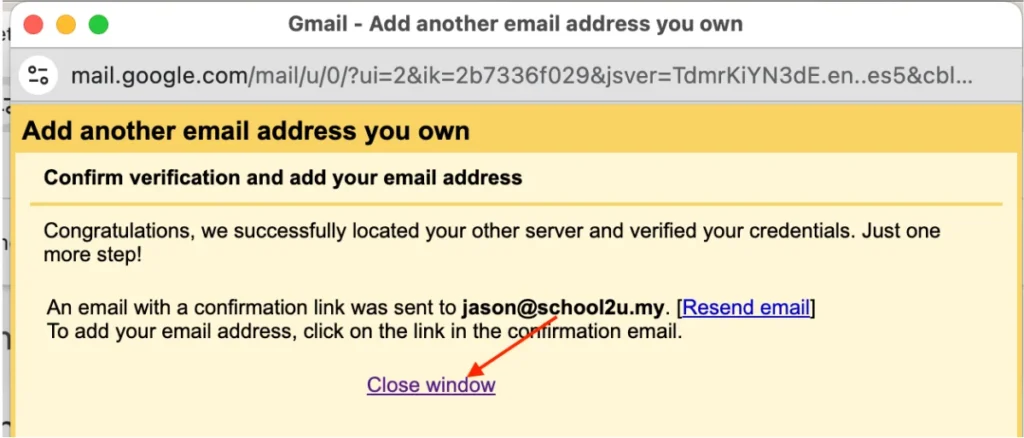
- Verify your ownership
-
-
- Gmail will send a confirmation email to your webmail inbox
- Open your webmail (e.g., via cPanel or another mail client)
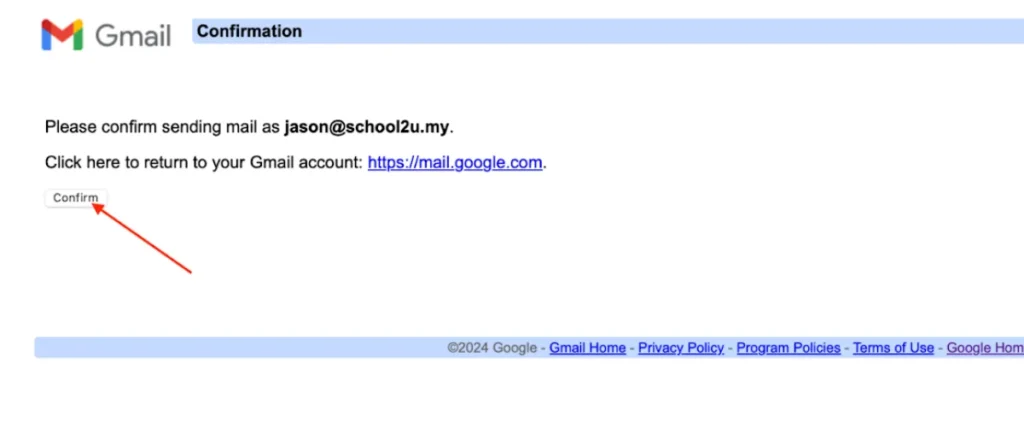
- Click the confirmation link in the email
- Click Confirm
-
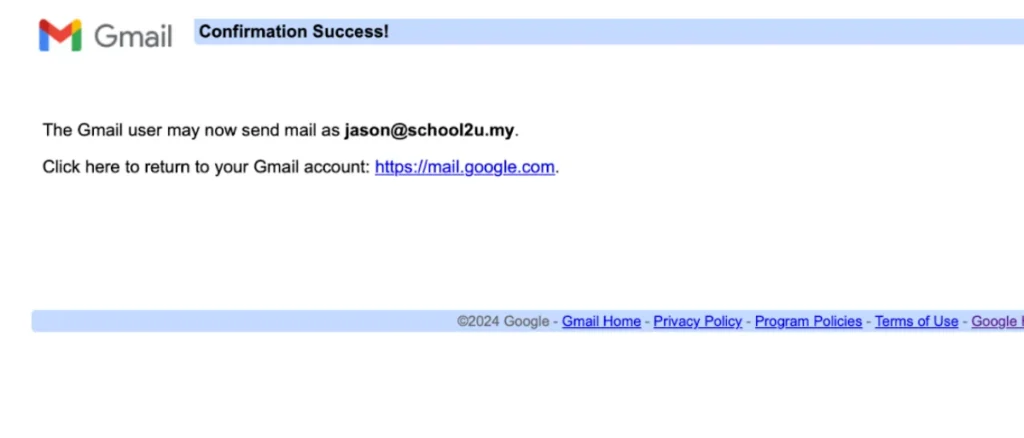
- You will be notified that confirmation success
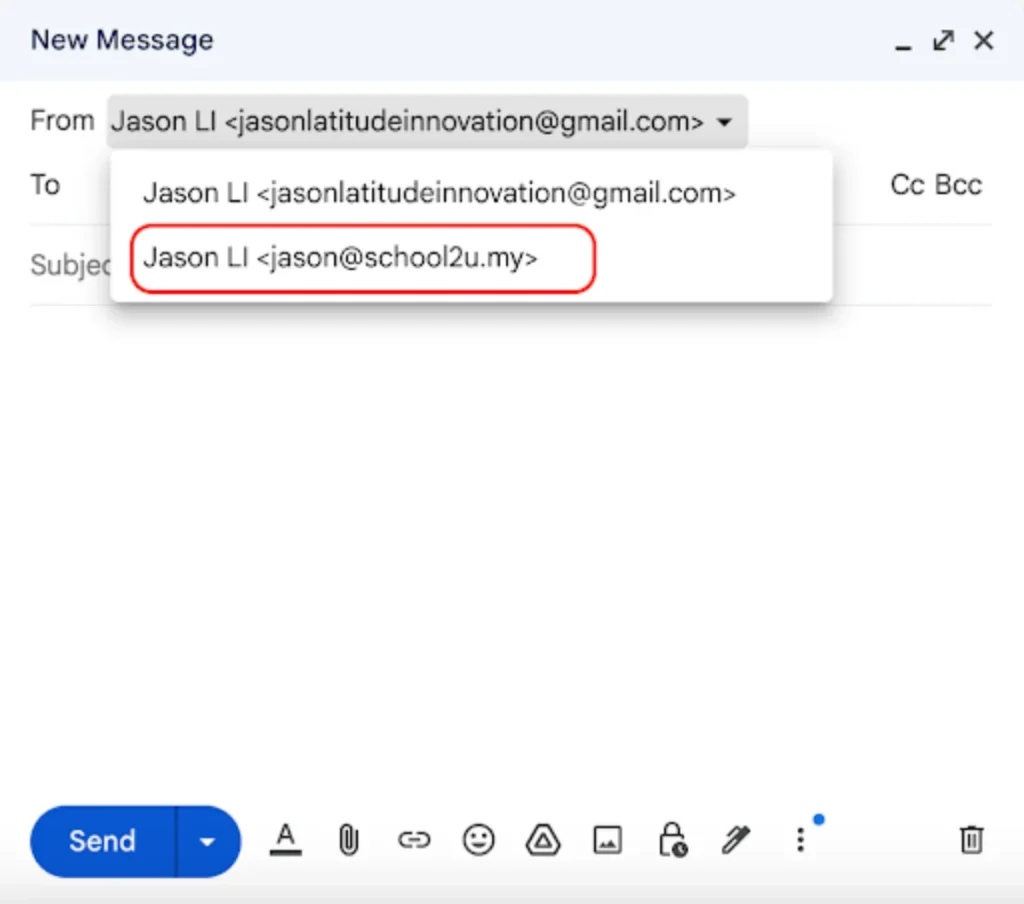
- Go back to Gmail and Compose a New Email
Now that your webmail address is successfully added as a sender, return to Gmail and compose a new email. You should see a “From” field where you can choose your webmail address as the sender.
Conclusion
Congratulations! You’ve successfully added your webmail address as a sender in Gmail. This method will save you time, improve efficiency, and allow you to manage all your email communications in one place. Whether you are using Gmail for personal use or managing multiple email addresses for business purposes, this integration simplifies the process of switching between different email accounts. Happy emailing!