What is Facebook Pixel?
It is an algorithm to retarget website visitors using Facebook advertising and track conversion rates.
Before begin:
In order to use Facebook pixel, you must have one business website.
Access to one Facebook business account.
How to create a Facebook pixel?
1. Open Facebook business account, click the dropdown arrow at the top right bar.

2.Select Advertising on Facebook
3. Click Create An Ad
4. Go to Data Sources in Events Manager
5. Click Get Started
6. Name your pixel and enter website URL
7. Click Create
Your Facebook Pixel done created
How to link WordPress site with Facebook Pixel?
1. Go to Data source in Event Manager
List of websites with Pixel ID shown
2. Copy the Pixel ID for the site
3. Go to site dashboard in WordPress
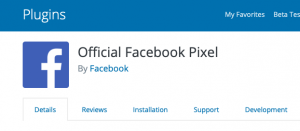
4. Install and activate the plugin of Official Facebook Pixel

5. After activate, click Facebook Pixel in Settings tab of dashboard
6. Paste the Pixel ID into the field provided
7. Click Save Changes
8. Click Visit Site in dashboard
9. Open back the Event manager tab and refresh the browser
10. Check the indicator on right side become green

How to test is it working?
1.Install Facebook Pixel Helper extension

2. After installed, visit the site and click the icon in the address bar to check pop out.

How to add multiple websites using one Pixel ID?
1. Go to Custom conversions in Event Manager
2. Click create custom conversion button at upper right
A pop-out shown.

3. Select contains and add URL in the field provided
4. Add website name for Name field
5. Select category you want to track for the sites
6. Click Create
The created sites will be shown on the list.
