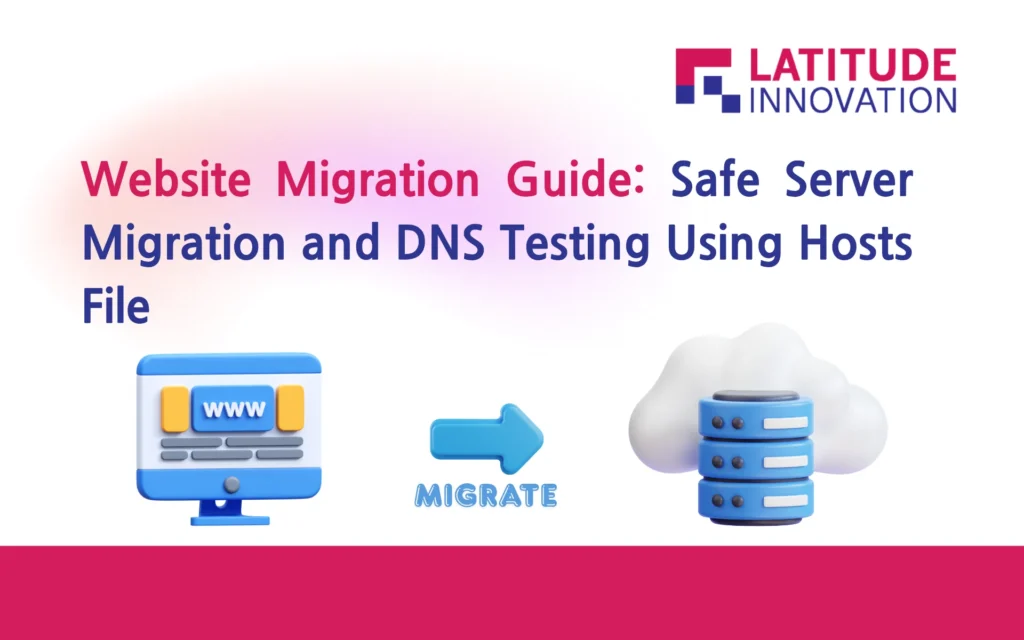
Website Migration Guide: Safe Server Migration and DNS Testing Using Hosts File
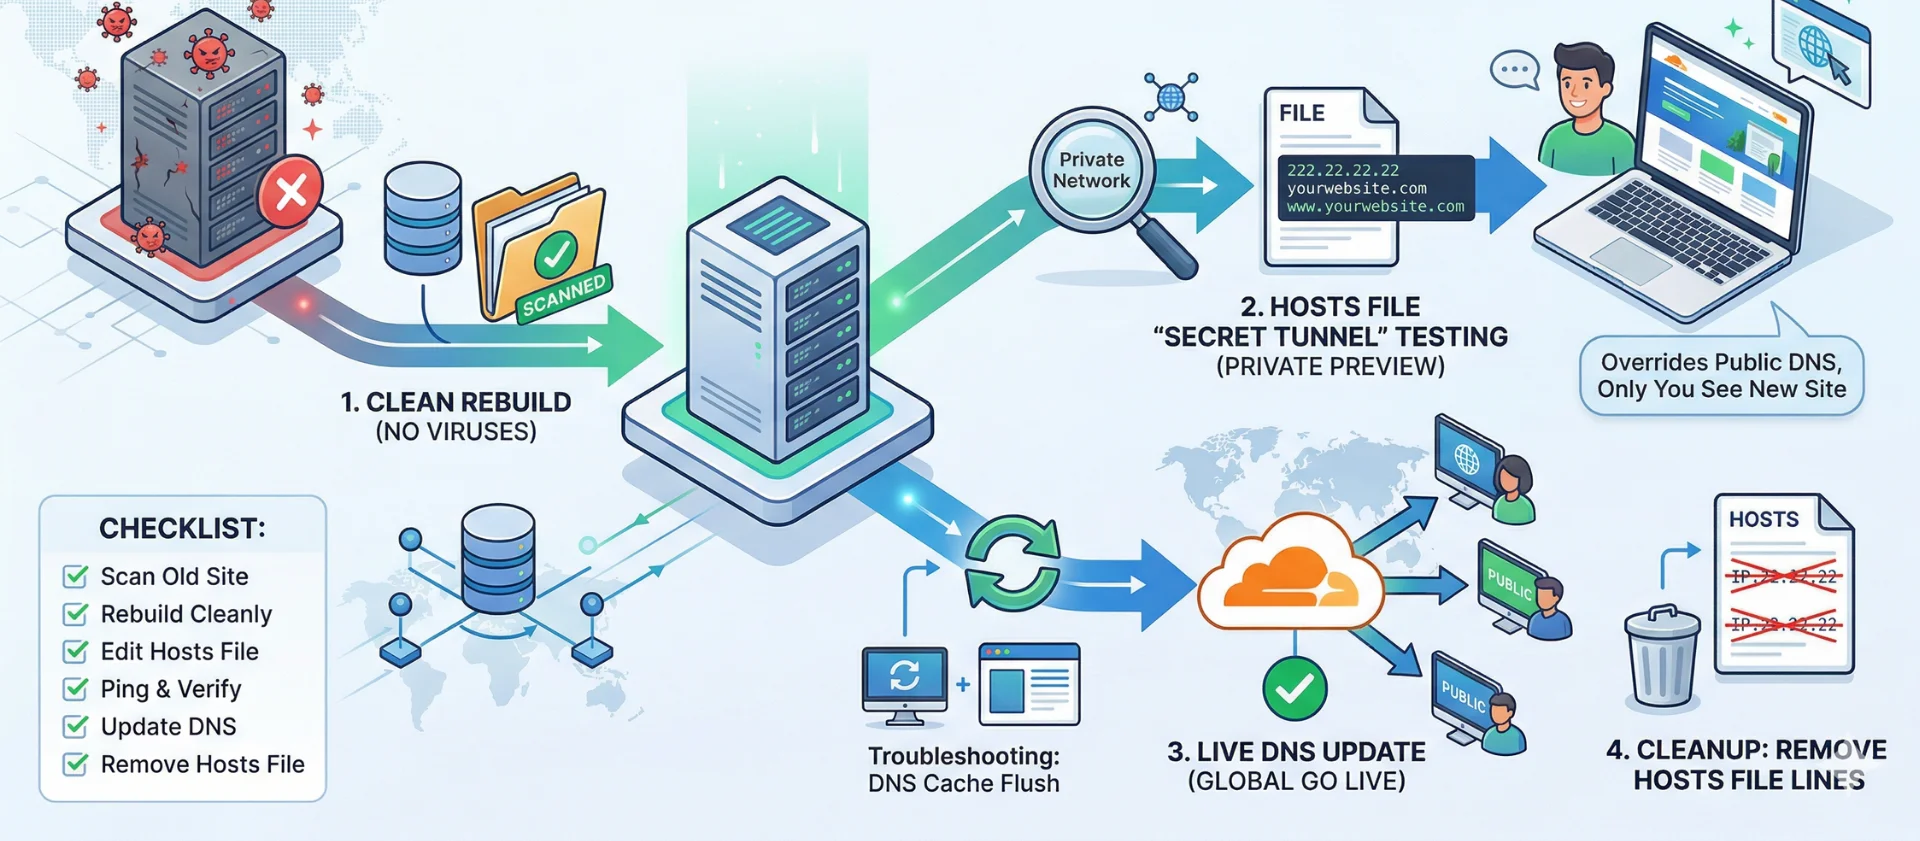
Migrating a website is a critical process. Whether you are escaping a compromised environment or upgrading for better performance, the goal is to move your data without transferring infected or unnecessary files. This guide provides a semi-professional workflow to ensure a clean, verified transition.
Part 1: The Strategy — Audit and Preparation
1. Why Migrate? (The Motivation)
- Security: If your current server is compromised, a fresh start is safer than attempting to patch deep-rooted malware.
- Performance: Moving to hardware with more CPU/RAM or a better network path.
- Optimization: Relocating closer to your target audience for reduced latency.
2. When is the “Right Time”?
- Maintenance Window: Choose a period of lowest traffic (e.g., Sunday, 3:00 AM).
- Pre-Launch: Complete all migrations weeks before any major marketing campaigns.
- Urgency: If a security breach is detected, prioritize an immediate “Clean File” migration.
3. The “Zero-Trust” Migration Rule
If your server is compromised, do not perform a standard “full backup.” Instead, follow this sanitized workflow:
- Export Data: Export only the SQL database (text-based data).
- Sanitize Assets: Download only the uploads folder and scan for malicious scripts on your local machine.
- Clean Rebuild: Do not copy system folders. Rebuild the application using fresh sources (WordPress core, themes, and plugins) directly on the new server.
- Configuration Update: Update your .env or wp-config.php with the new database credentials and ensure the table_prefix matches your original export.
Part 2: The "Secret Tunnel" — Testing via the Hosts File
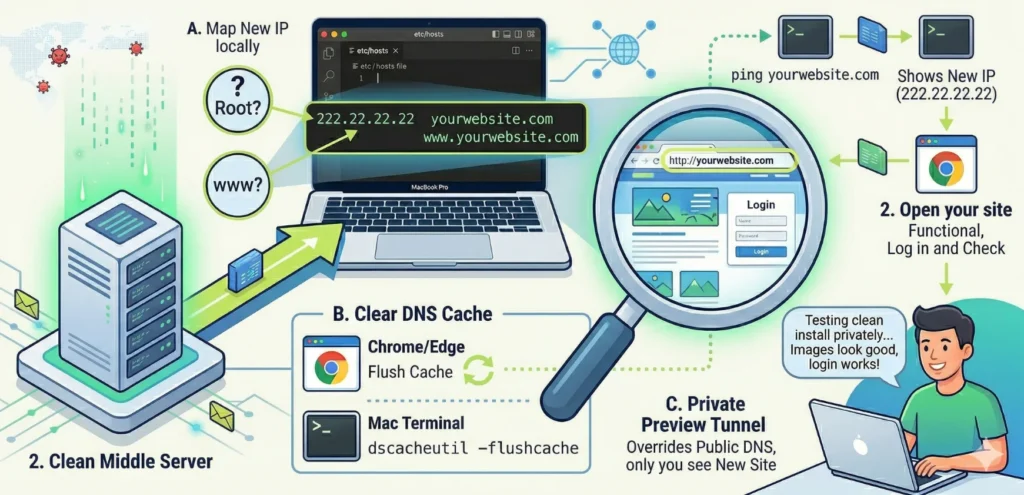
The hosts file is a local plain-text file that maps hostnames to IP addresses. It overrides public DNS, forcing your computer to resolve a domain to a specific IP before it ever checks the internet (like Cloudflare).
1. The IP Logic
- Old Server IP: (e.g., 111.11.11.11) — The source/infected server.
- New Server IP: (e.g., 222.22.22.22) — Your clean destination.
- The Goal: By mapping your domain to the New IP locally, you can “preview” the new server while the rest of the world still interacts with the old one.
2. Editing the Hosts File (By OS)
For macOS
- Open Terminal (Cmd + Space, type “Terminal”).
- Type: sudo nano /etc/hosts and enter your password.
- Add the mapping at the bottom:
222.22.22.22 yourwebsite.com
222.22.22.22 www.yourwebsite.com - Press Control + O and Enter to save, then Control + X to exit.
For Windows 10 & 11
- Open Notepad as Administrator.
- Open C:\Windows\System32\drivers\etc\hosts.
- Add the same two lines at the bottom:
222.22.22.22 yourwebsite.com
222.22.22.22 www.yourwebsite.com - Save and close.
Part 3: Verification & Quality Assurance
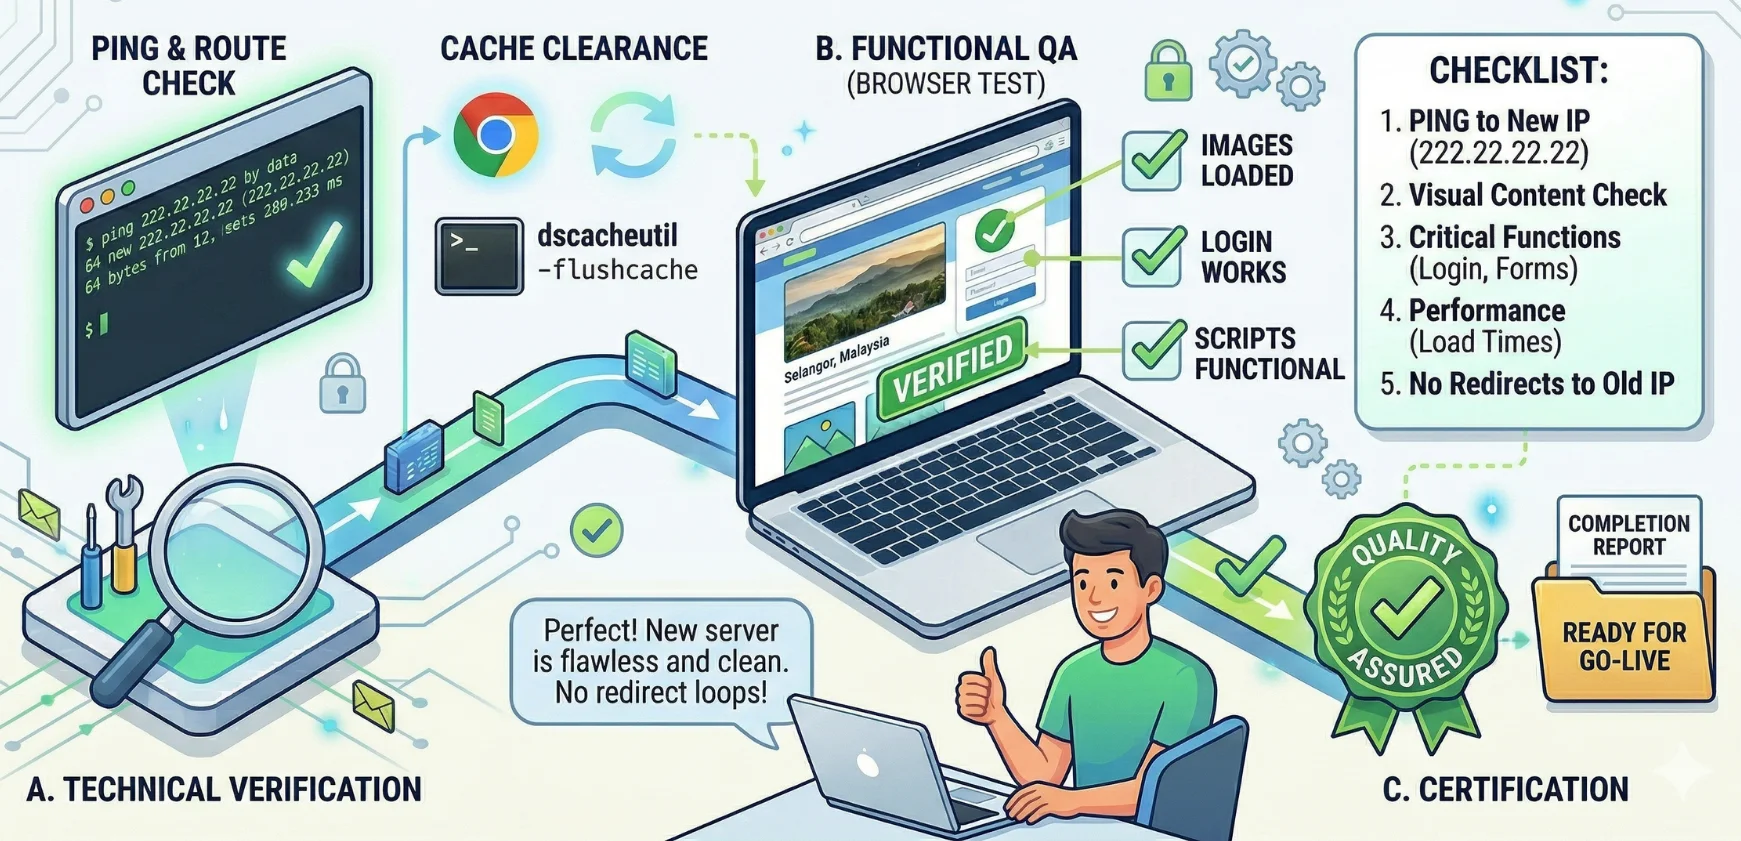
1. Technical Verification (Ping)
Open your Terminal or Command Prompt and type:
ping yourwebsite.com
- SUCCESS: If the response shows the New IP, your “tunnel” is active.
- FAIL: If it shows the Old IP, your DNS cache is likely stuck.
2. Functional Verification (Browser Check)
Once the ping is correct, open your browser and perform these checks:
- Visual Check: Do all images and CSS files load correctly?
- Login Check: Can you access the admin dashboard on the new server?
- Logic Check: Ensure the site does not redirect you back to the old IP.
3. Troubleshooting: Stuck Cache
- Mac Flush: sudo dscacheutil -flushcache; sudo killall -HUP mDNSResponder
- Browser Flush: Go to chrome://net-internals/#dns and click “Clear host cache”.
- Last Resort: Restart your machine to force a file re-read.
Part 4: Final Cutover and Cleanup
1. The “Cleanup” (Critical)
After you have updated your live DNS records (e.g., in Cloudflare) and the migration is successful:
- Re-open your hosts file.
- Delete these specific lines from the bottom of the file:
222.22.22.22 yourwebsite.com
222.22.22.22 www.yourwebsite.com - Why? If you leave these lines, your computer will remain “stuck” on this IP forever. If the hosting provider changes your IP in the future, you will see a connection error while the site is actually live.
Summary Checklist
Step | Action | Why? |
Audit | Scan with Sucuri/VirusTotal | Confirm if the domain is flagged. |
Sanitize | Fresh Install + DB Import | Prevents transferring malware. |
Map | Add New IP to Hosts File | Creates a private testing environment. |
Verify | Ping + Browser Login | Ensures the new server is fully functional. |
Switch | Update Cloudflare DNS | Directs public traffic to the new server. |
Clean | Remove Hosts File lines | Restores standard internet resolution. |