Why Need To Add Google Tag Manager To A WordPress Website
There are several reasons :
To works perfectly with Google Analytics
Have total control of a website
To speed up the website loading website
How To Add Google Tag Manager To WordPress Website
Below Are The Following Steps :
Step 1 : Search “Google Tag Manager” and click the “Sign In button”
Step 2 : Click on “Create Account” button
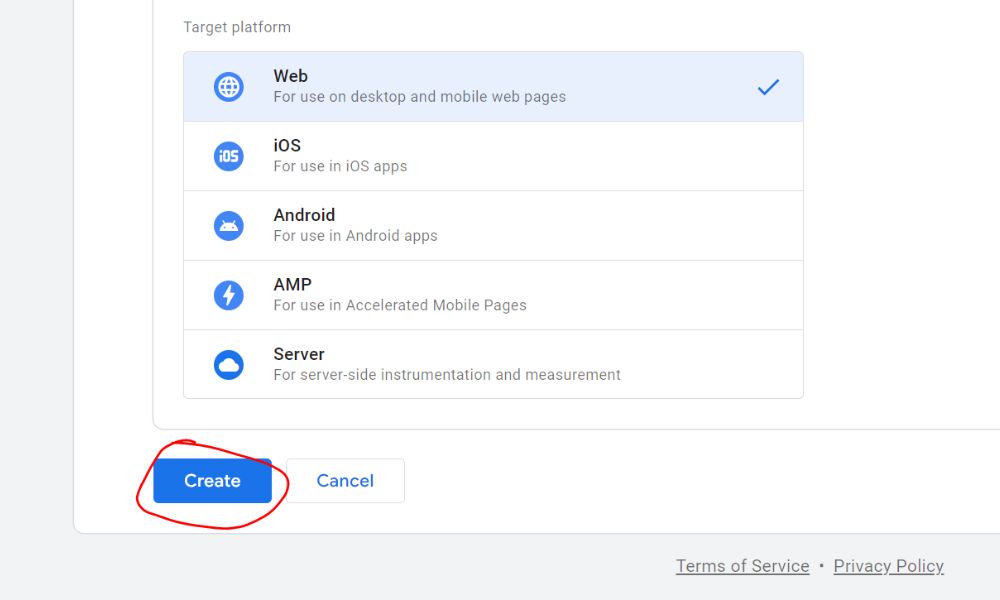
Step 3 : Fill all the fields Account Setup i. Account Name : [Company Name] ii. Country : [Malaysia] Container Setup i. Container name : [domain.com.my] ii. Target platform : tick for the “Web”
Step 4 : Click on “Create” button
Step 5 : Click “tick” at the checkbox below and click “Yes” button
Step 6 : Copy the <head> and <body> code at Notepad
Step 7 : Login to WordPress Dashboard [https://website.com.my/wp-admin]
Step 8 : Click on “Plugins” and then click on the “Add New” button
Step 9 : Type “Insert Header and Footers by WPBeginner” and click on “Install Now” button
Step 10 : “ Click on “Activate” button
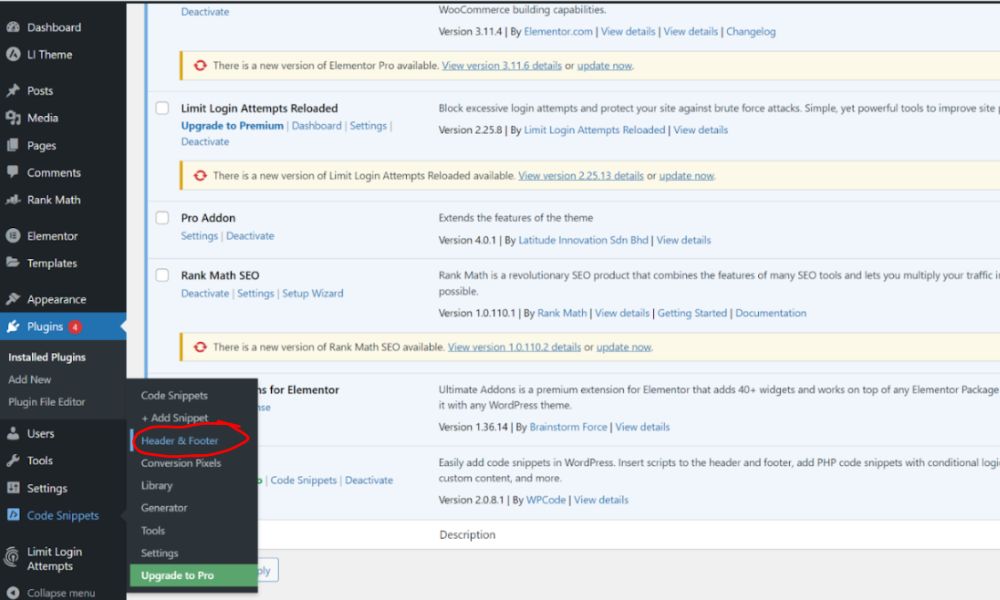
Step 11 : Click on “Code Snippets” and click on the “Header & Footer”
Step 12 : Paste the codes for <head> and <body> by copying from Google Tag Manager. Once you are done, click on the “Save Changes” button.